Thursday, April 24, 2025

Seize The Birthday - Stencilling

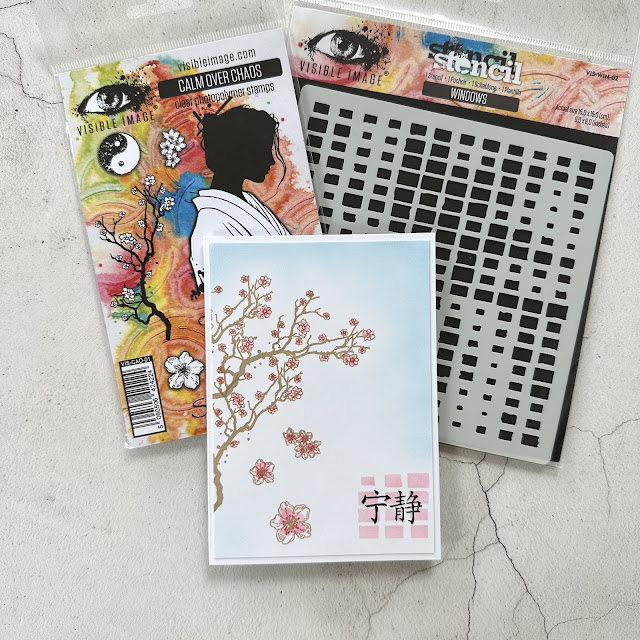
Yay, I'm hosting Seize The Birthday for this challenge, and I've gone for Stencilling.  You can stencil however you like - a whole background or just add it as a highlight to a particular area, entirely up to you.

For my card I've used the Count Me In stencil from Visible Image, along with Queen Girl from Unity.

Pop on over to the Seize The Birthday blog for some more fabulous inspiration from the Design Team and our Surprise Party Guests, and play along.  If you don't want to include stencilling, you can still play along with our Anything Goes option.


Wednesday, April 16, 2025

Visible Image - Flora and Fauna


Our theme at Visible Image this week is Flora and Fauna, which is very timely, because the flora and fauna near me think it's summer already with all the sunshine we've been having.  In particular, the magnolias have been stunning, and I wanted to capture their magnificent blooms.  

I started off by stamping the main image from Total Chaos onto masking paper a couple of times, then stamped the first magnolia in the bottom left corner of my piece of card.  I masked that, then stamped the second flower offset and above, then masked that and stamped the third.  I used Vintage Photo Archival ink instead of my normal black waterproof pigment ink.


Masking the flowers off as necessary, I stamped the leaf three times in Peeled Paint Distress ink.


Then using Distress Inks as watercolour paints, I sloshed some colour onto the flowers and leaves.


The archival ink outline meant that it wouldn't run into the colour on the flowers, but on the leaves I used the same Peeled Paint Distress ink to watercolour them and drag the colour in, but left any inner circles white.  Using watercolour pencils, I added a blue border around the images to represent sky.


The birthday sentiment is from Birthday Wishes.  I stamped it in Catherine Pooler Sixteen Candles ink, then a second time with Pixie Dust, only inking the lower half.


I folded a piece of brown A4 card to A5, then stencilled some leaves around the edges using Brilliance Lightning Black ink, which has gold pigment that really shows up well on dark card when the light catches it.


Then I mounted the front panel onto the card.  I didn't even need to splatter any ink over the design because the splatters are built into the stamps.


In my stash I had a sheet of butterflies from Wings of Change that I had already painted in similar shades.


I took the smallest one, added a bit of Picked Raspberry to the edges and cut it out, then mounted it onto the card panel, folding it back slightly.


Here's a look at the finished card with the stamps and stencil, which are all available in the Visible Image store.


Thursday, April 10, 2025

Seize The Birthday - Layer It


Hello peeps, it's time for a new challenge at Seize The Birthday, and our leader Nancy has chosen 'Layer It'.  If you're not sure how to interpret it, she has a few suggestions for you in her intro.

I wanted to use this new-to-me stamp set from Concord & 9th, Here's The Scoop.  I stamped the bowl, cherry and ice cream scoops onto patterned paper, cut them, then layered them onto a linen-look panel which I'd die-cut with a Penny Black die.  I stamped and fussy cut the sentiment for the bowl and layered that on, then layered the whole thing onto my base card.

The ice cream scoop paper has gold veining, which doesn't show up on the photo, and the cherry is glazed, which also doesn't show up on the photo.

Pop on over to the Seize The Birthday blog for some more fabulous inspiration from the team, and from our surprise party guests, Leslie and Nance.

If you don't want to use layering, you can still play along with any birthday-themed project.

Happy stamping!

Wednesday, April 02, 2025

Visible Image - Mindfulness


Our theme at Visible Image this week is Mindfulness, and for my non-card assignment I've made two bookmarks (although they could just as easily be tags).  I prefer physical books to e-readers, so bookmarks
are a necessity for me.

I wanted the main focus of my bookmark to be half of the huge butterfly from the Butterfly Effect set, along with the sentiment "every single thing you do matters".  But I can't just stamp half a butterfly so I positioned it fairly centrally on a piece of A5 watercolour card, then inked it with Distress Stains.


I spritzed the watercolour card before stamping, which allows the stain to bleed out over quite a large area.  The advantage of using a stamping platform is that you can re-ink and re-spritz any areas that didn't get enough bleed.


Once it was dry I added some pearlescent paint from the new metallic paints set to the central area of the wings.


Then using Distress Inks in the same colours as the stains, I inked the butterfly and re-stamped it to give definition.


I chose Shabby Shutters, Crushed Olive and Salvaged Patina for the background to represent sky and greenery.


Using the same inks I stamped the background stamps a few times, and the small butterfly and sentiments in black.  You can also see where I've used the Windows stencil in a few areas.


I also used the large stamp from the new Particle stamp set, which is a great background set.


Because I wanted the butterfly at an angle I couldn't just cut the panel exactly in half, but who says what size bookmarks have to be anyway?  I flicked some of the aqua metallic ink over the two panels, along with some white gesso.


I mounted both panels onto purple card for stability, punched holes and added reinforcer rings, and added some coordinating fibres.


Here's a close-up of the first bookmark,


and the second one:


The stamps and stencils are available on the Visible Image website here.