Hello there, it's time for my Visible Image DT post, and today I've got a twofer for you using the fabulous Sax It Up stencil. I like to ink my stencils to make mono prints, and invariably there's enough ink left after the first print to spritz again and get a second, lighter print.
I used Distress Ink minis to ink up the stencil. The ink will naturally bead up, and beads up bigger when you spritz it with water. Once spritzed, I flipped it and laid it on my card, covered it with a piece of kitchen roll and squashed the beading down.
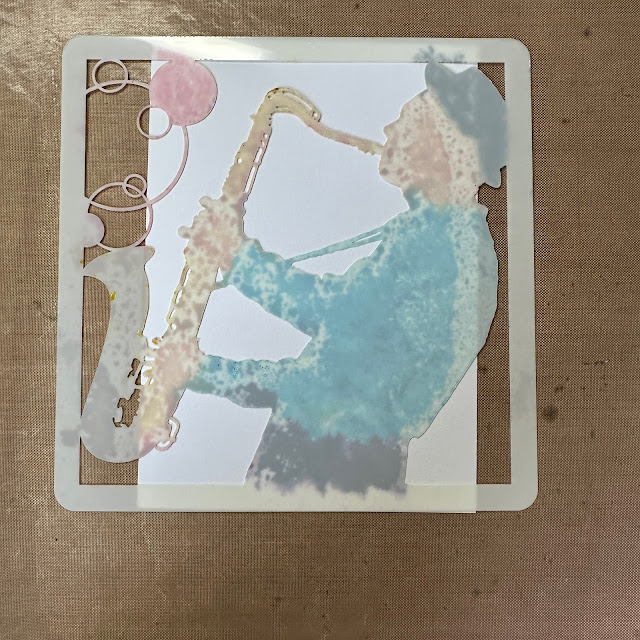
If you've spritzed enough water, once you squash the stencil down, the spritzed ink will spread along the stencil to give a complete image. It was still a little patchy, as you can see through the stencil, but it still gave a decent print. And there was enough ink left on the stencil to get a second print.
This time the watered-down ink spread further, and gave a paler print. I forgot to take photos of the prints before I added the backgrounds!
I replaced the cleaned stencil back onto the first print and sponged Antique Linen and Rusty Hinge distress inks onto the background.
On the second print, I blended Black Soot distress ink.
I couldn't get a black enough coverage, so I swapped to Distress Oxide and got a really good black.
So then it was a case of trimming and mounting the panels to make cards.
I like how (some of) the mottled parts of the image imply highlights, and how the purple of the trousers bleeds into the white border on this card. And the golden glow of the background.
The solid black background balances well with the loose colours on this print. I trimmed away the white borders at the top and bottom and mounted it onto yellow card to pick out the yellow highlights, and added a strip of music washi tape at the bottom.
Did you notice that I didn't use the full width of the stencil? Don't be afraid to crop images to fit your card, it gives the impression of zooming in on the subject.
You can get this and other fabulous stencils at the Visible Image store, pop on over and have a look!


